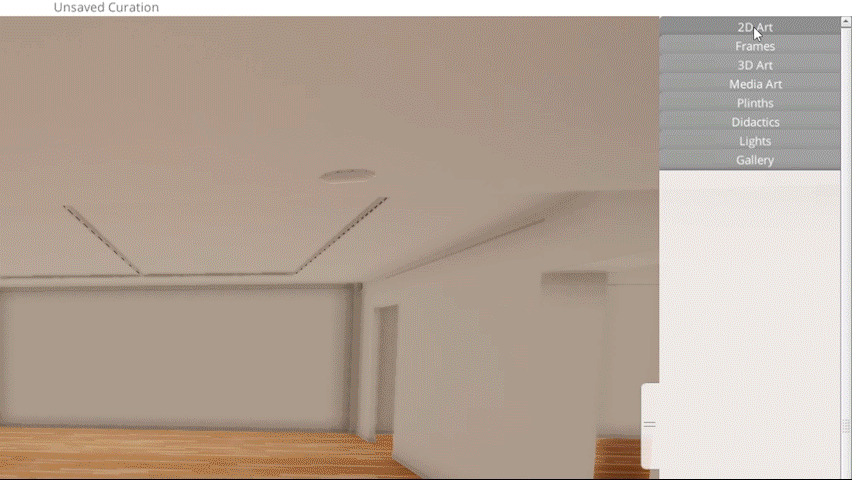
How Can We Help?
Importing Artworks
Ortelia Curator 2020 can import and display both 2D (images) and 3D (geometric models) artworks in a wide variety of formats.
Importing 2D Artworks
Importing images for an exhibition is carried out through the ‘2D Artwork’ tab. Images can be imported either:
- – Individually
- – As a selection
- – As a folder
- – Automatically from a Content Management System (CMS).
Ortelia Curator supports multiple 2D and 3D formats. For a complete list refer to the appendix.
Individual Image Import
To import a single image, click the ‘Import’ button located at on the bottom left hand side of the tab. An ‘Open’ dialogue box will appear, you can navigate to the folder where the image you want is located. In the ‘Open’ dialogue select the format of image you want to import from the dropdown box of formats.
Select the image and click ‘Open’ to continue. The image will be shown in the ‘Artworks’ List.
To import multiple images, choose multiple artworks by holding the shift or control keys and clicking on the images required. Shift and Click is used for a series of images in a list whilst CNTRL and Click allows the selection of multiple images not in series.
Images will be imported at the correct Aspect/Ratio; however, the actual size of the image will need to be manually entered in the Height and Width input boxes. Select the imported image and enter the correct real-world dimensions.
Note: Ortelia Curator embeds all images into a single file in order that images cannot be extracted from the save file. As such, the final size of a save file will depend on the number and size of images imported. It is recommended that images are kept to a maximum of 2048 pixels and saved as JPEG format in order to maintain and reasonable overall final save file size.
Importing a Folder of images
To import multiple images, click the ‘Import Folder‘ button located on the bottom right-hand corner of the 2D Artwork Tab. A dialogue box will appear, you can navigate to the folder where the images you require are located.
In the ‘Open‘ dialogue select the format of image you want to import from the dropdown box of formats.
Select the first image in the list and click ‘Open‘. The artwork will begin importing. Depending on your hardware this may take some time.
When the images have been imported, they will appear in the ‘Artwork’ list. Images will be imported at the correct Aspect/Ratio; however, the actual size of the image will need to be manually entered in the Height and Width input boxes. Select the imported image and enter the correct real-world dimensions.
Artwork can be removed from the Artwork list by selecting the image from the list and then clicking the Delete button
Importing from a CMS
Ortelia Curator connects to any CMS that can export a .csv file allowing automatic importing of multiple files.
Importing artworks via a .csv file guarantees that all artwork files can be imported with real-world dimensions and associated descriptive text automatically.
Importing 3D Artworks
Ortelia Curator currently a number of 3D geometry formats, refer to the appendix for more details.. In addition to 3D geometry Ortelia Curator allows you to import an image (Sprite) in place of an actual 3D file. The ‘3D Artwork‘ tab provides the necessary tools for importing and manipulation 3D artwork and sprites.
3D Artwork
Ortelia Curator currently supports a number of 3D geometry format. Refer to the manual for a list of formats compatible with Ortelia Curator. In addition to 3D geometry Ortelia Curator allows you to import an image (Sprite) in place of an actual 3D file. The ‘3D Artwork‘ tab provides the necessary tools for importing and manipulation 3D artwork and sprites.
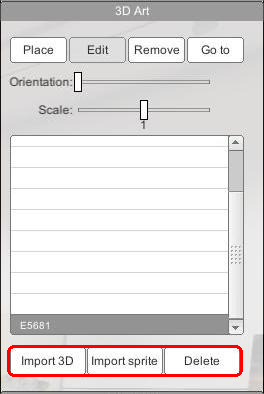 |
Note: You can automatically import your 3D artworks using the CMS Import feature above. Refer to the Preparing 3D models section for details on how to set the correct dimensions for you model. |
For more detail on how to manipulate 3D models and Sprites in the work area and refer to the Placing and Manipulating 3D Artwork section