How Can We Help?
The Ortelia Curator Design Panels – Overview
The Design Panel Overview
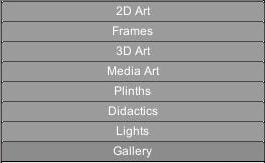
The Design panel is where all artworks and design functions are accessed and organised. The panel can be expanded and hidden by clicking the panel tab.The ‘Design’ panel is divided into six individual tabs that allow access to categorised functionality. These are :
| 2D Artwork | Tools for importing, editing and placing 2D artworks |
| Frames | Tools for framing 2D artwork |
| 3D Artwork | Tools for importing, editing and placing 3D artworks |
| Media Art | Tools for importing and placing video and sound files |
| Plinths | Tools for creating and placing Plinths |
| Didactics | Tools for creating and editing information panels |
| Lights | Tools for creating, placing and modifying lights |
| Gallery | Tools for painting walls, setting hanging lines, taking measurements, adding notes etc. |
2D Artwork Tab
The 2D artwork tab allows users to import and place 2D artwork in the gallery space.
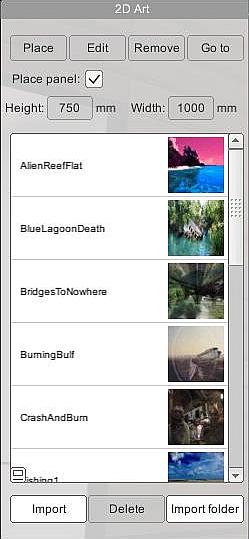 |
Import | Import a single 2D (single image) artwork |
| Import Folder | Import a folder of artworks (multiple images) | |
| Delete | Delete an artwork from the list | |
| Place | Place an artwork on a wall or surface | |
| Edit | Crop an artwork image | |
| Remove | Remove a selected artwork from the current exhibition | |
| Goto | Jump to a selected artwork in the gallery by selecting it from the ‘Artworks’ list | |
| Width | Set the width (in mm) of the image selected in the list | |
| Height | Set the height (in mm) of the image selected in the list |
3D Artwork Tab
The 3D artwork tab allows users to import and place 3D artwork in the gallery.
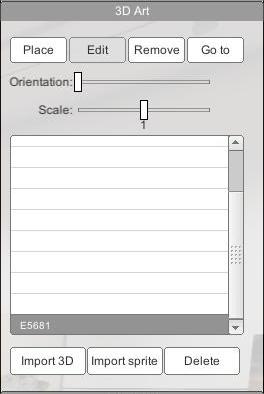 |
Import 3D | Import a 3D artwork (Collada .dae format) |
| Import Sprite | Import an image to use as a billboard in place of a 3D artwork | |
| Delete | Delete a 3D artwork or sprite from the ‘Artworks’ list | |
| Place | Place a 3D artwork or sprite on a surface | |
| Remove | Remove a 3D artwork or sprite from an exhibition | |
| Goto | Jump to a selected 3D artwork in the gallery by selecting it from the ‘artworks’ list | |
| Edit | Edit a sprite | |
| Orientation | Set the orientation of the selected 3D artwork | |
| Scale | Change the scale of the selected 3D artwork or sprite |
Media Art Tab
The Media Art tab allows users to import and place video and sound.
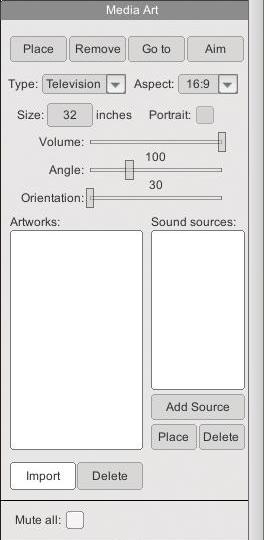 |
Place | Place a Projector, Monitor, Television, or Speaker in the gallery |
| Remove | Remove a Projector, Monitor, Television, or Speaker from the gallery | |
| GoTo | Jump to a selected video or sound in the gallery by selecting it from the ‘artworks’ list | |
| Aim | Aim the projected video at a surface | |
| Type | Select from the available display devices such as Television, Computer Monitor, Projection, or speaker | |
| Aspect | Set the Aspect ratio of a television, computer monitor or projection | |
| size | Set the size of the television screen or monitor | |
| Volume | Adjust the volume of the video or sound | |
| Angle | Set the throw angle of a projection | |
| Orientation | Set the Orientation of a projection or Television screen | |
| Artworks | List of imported video and sound files | |
| Sound Sources | List of sound sources (Speakers) currently in the design. | |
| Import | Import a video or sound file | |
| Delete | Delete a selected video or sound file from the artworks |
Plinths Tab
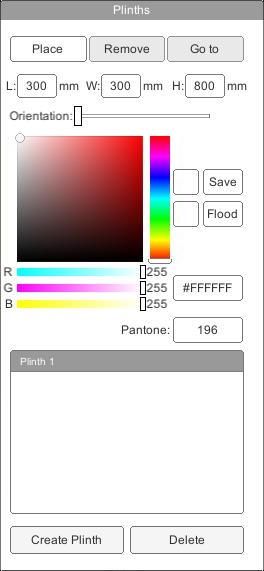 |
Place | Place a Plinth in the gallery space |
| Remove | Remove a Plinth in the gallery space | |
| Goto | Jump to a selected plinth in the gallery by selecting it from the ‘Plinths’ list | |
| L, W, H. | Set the Length, Width and Height of the Plinth | |
| Orientation | Rotate the plinth about a 360° axis | |
| Save/Flood | Save a Plinth colour and paint all plinths in the gallery with the same colour | |
| Plinths List | The list of Plinths in the exhibition | |
| Create Plinth | Create a new Plinth | |
| Delete | Delete a Plinth from the list |
Didactics Tab
The Didactics tab allows users to create, edit and delete information panels
| New | Create a new information panel |
| Delete | Delete a selected information panel from the list |
| Replace Image | Add a user loaded image to the panel |
| Remove Image | Removed a user loaded image from the panel |
| Import Folder | Import a folder of images as information panels |
| Place | Place a didactic panel on a surface |
| Edit | Edit an existing information panel |
| Remove | Remove a information panel from the exhibition |
| GoTo | Jump to a selected didactic panel in the gallery by selecting it from the ‘Didactic Panels’ list |
| Width | Set the width (in mm) of the selected information panel |
| Height | Set the height (in mm) of the selected information panel |
Gallery Tab
The Gallery tab gives users access to a variety of functions such as wall painting, notations and measurements
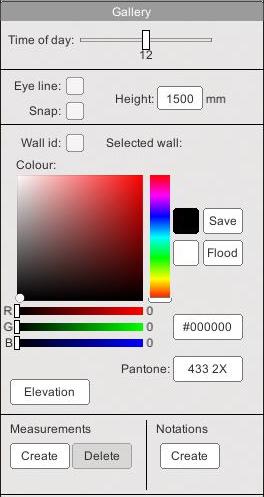 |
Time of Day | Set the time of day to test shadow and light effects |
| Eye Line | Turn Eye Line (Hanging height) on/off | |
| Snap | Snap artworks to the Eye Line when placing artworks | |
| Height | Set the Eye Line height from the base of the hanging surface (e.g. wall) | |
| Wall ID | Turn wall ID’s on and off | |
| Colour | Select a colour to paint the wall | |
| Save | Save the current wall colour | |
| Flood | Paint all the walls in the space with the saved colour | |
| Elevation | Generate elevations of a wall with artwork information | |
| Measurements: Create/Delete | Create and delete a distance measure | |
| Notations: create | Create a notation to place in the environment |
Lights Tab
The Lighting tab provides access to a variety of advanced lighting functions
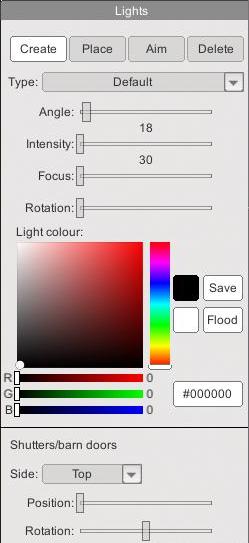 |
Create | Create a new light |
| Place | Place a light on a surface | |
| Aim | Aim the selected light | |
| Delete | Delete the selected light | |
| Type | Select the light type | |
| Angle | Set the cone angle of the selected light | |
| Intensity | Set the intensity (brightness) of the selected light | |
| Focus | Set the focus of the selected light | |
| Rotation | Rotate the selected light on its Z axis | |
| Save | Save the selected light colour | |
| Flood | Flood all the lights in the exhibition with the selected colour | |
| Light Colour | Select the light colour | |
| Ambient | Set the level of ambient light in the gallery | |
| Shutters/Barn Doors | Change which shutter to modify | |
| Position | Position shutters | |
| Rotation | Rotate barn-door shutters |
Frames Tab
The Frames tab allows users to frame artwork with a variety of framing options.
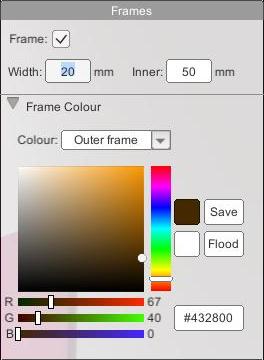 |
Frame | Frames the selected 2D artwork |
| Width | Sets the width of the frame | |
| Inner | Set the inner width of the backing panel | |
| Frame Colour | Select the colour of the frame and backing panel | |
| Save | Save the selected colour | |
| Flood | Paint all frames the saved colour | |
| Colour Value | Manually enter the colour value in Hex code |