Editing 2D and 3D Artwork
2D Artwork
There are two basic editing options available. These are:
- – Setting the physical dimensions of the artwork
- – Cropping the artwork
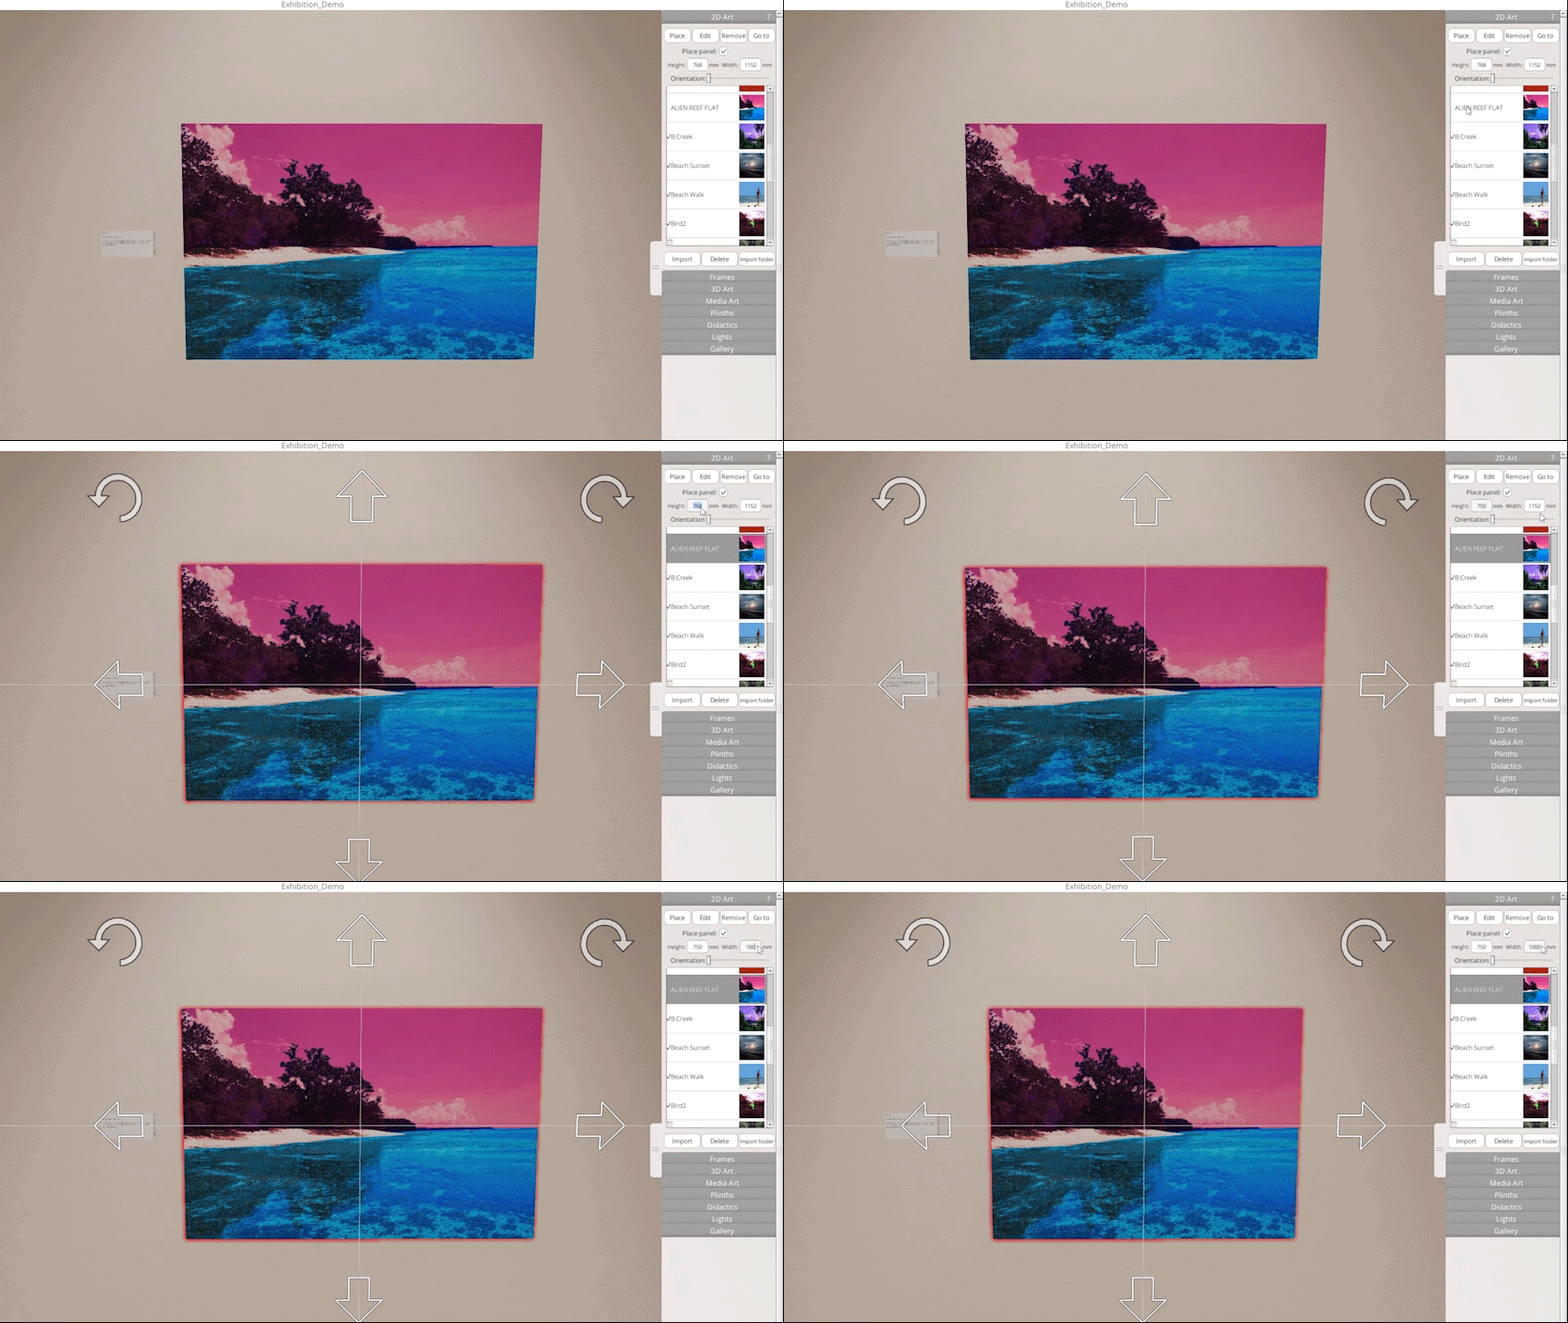
To set the physical dimensions select the artwork from the list by clicking on it with the Left Mouse Button (LMB). Enter the width and height in mm of the selected artwork.

In some instances you may need to crop an image to remove unwanted elements.
- Select the image you want to crop from the “Artwork‘ list.
- Click the ‘Edit‘ button.
![]()
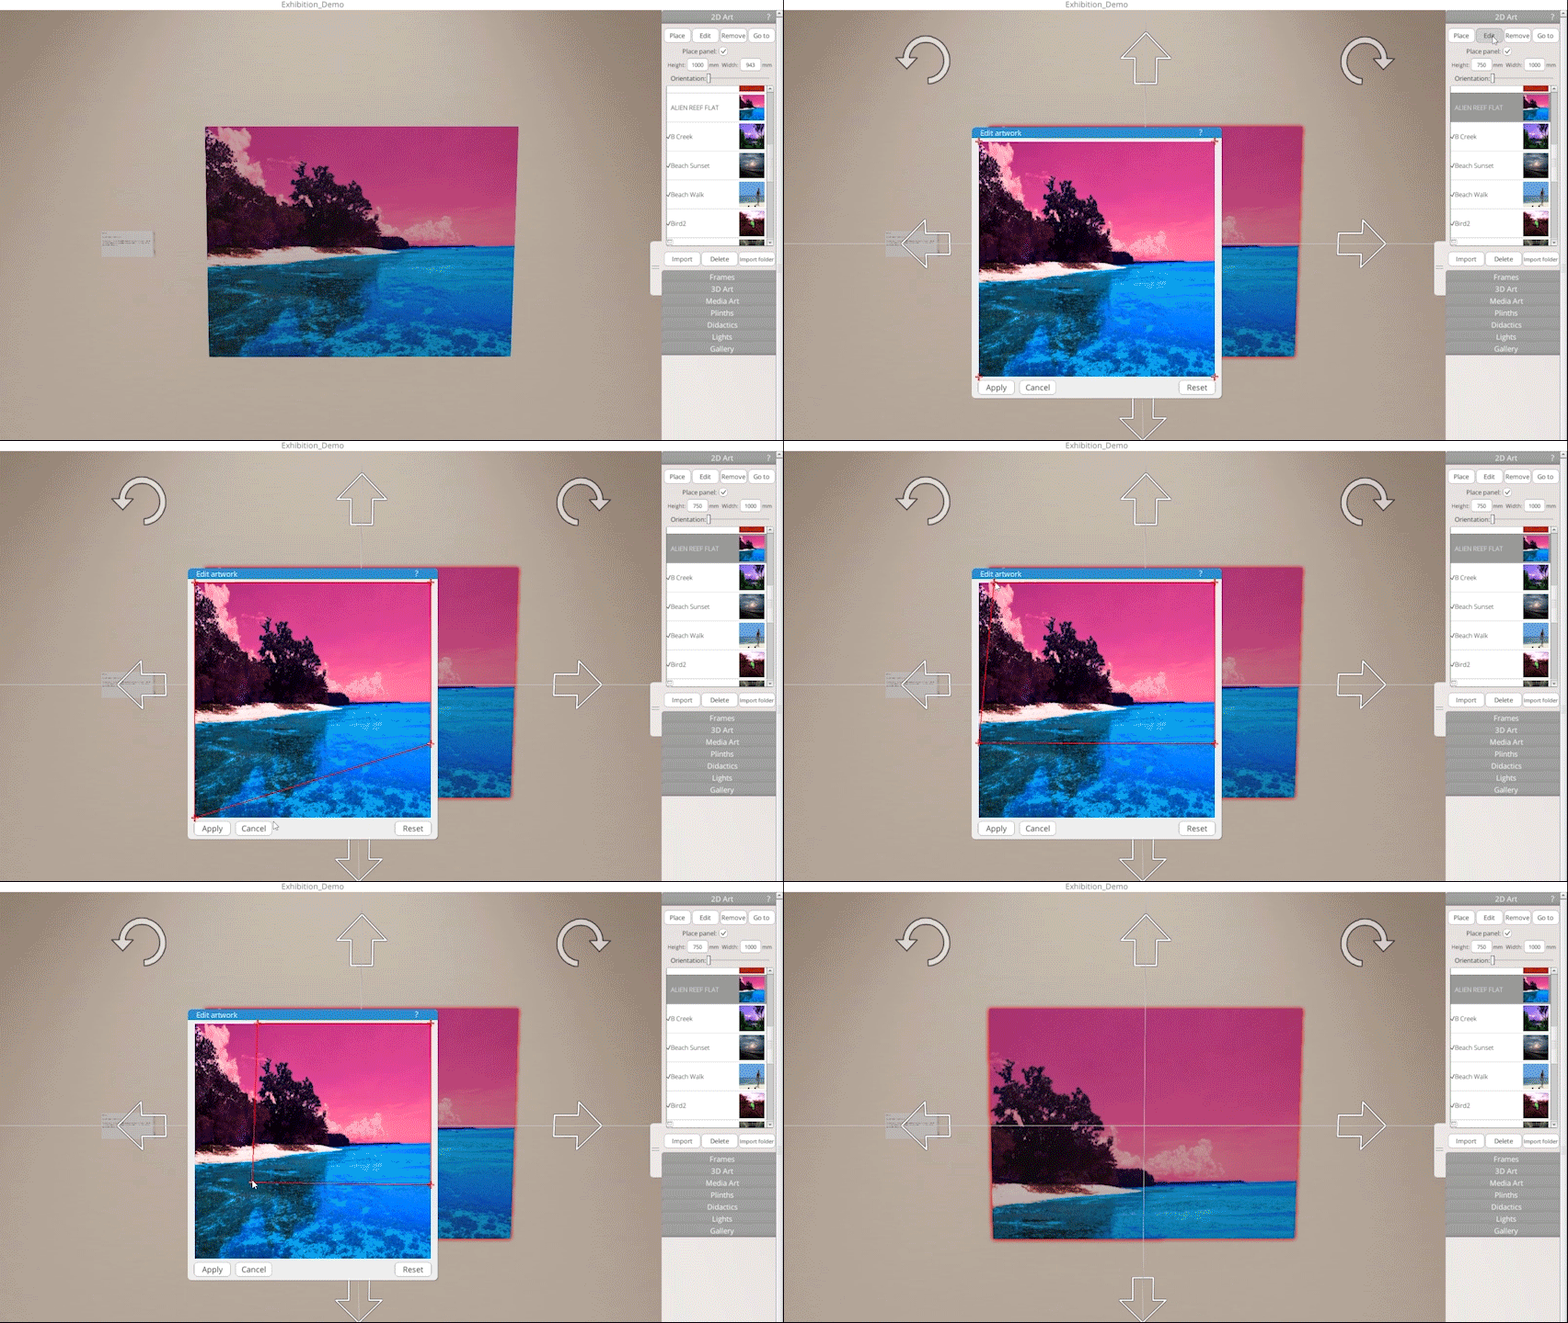
- – The image will appear in the ‘Crop Image‘ window.
- – The corners of the red box can be dragged to the new position.
- – When cropping is complete click the ‘Finish‘ button to return to the 3D environment.
- – To reset the cropping borders to their original position click the ‘Reset‘ button with the LMB
In the following example we have an artwork that must be cropped to remove a portion of the image.
 |
Cross-hairs on each corner can be selected by clicking and holding the LMB. Corners can then be dragged to the desired position |
The imaged will be displayed in its cropped state when added to your design.
3D Artwork – Using Sprites
3D artworks can be rotated and scaled using the ‘Rotation’ and ‘Scale’ sliders in the ‘3D Art’ Tab
